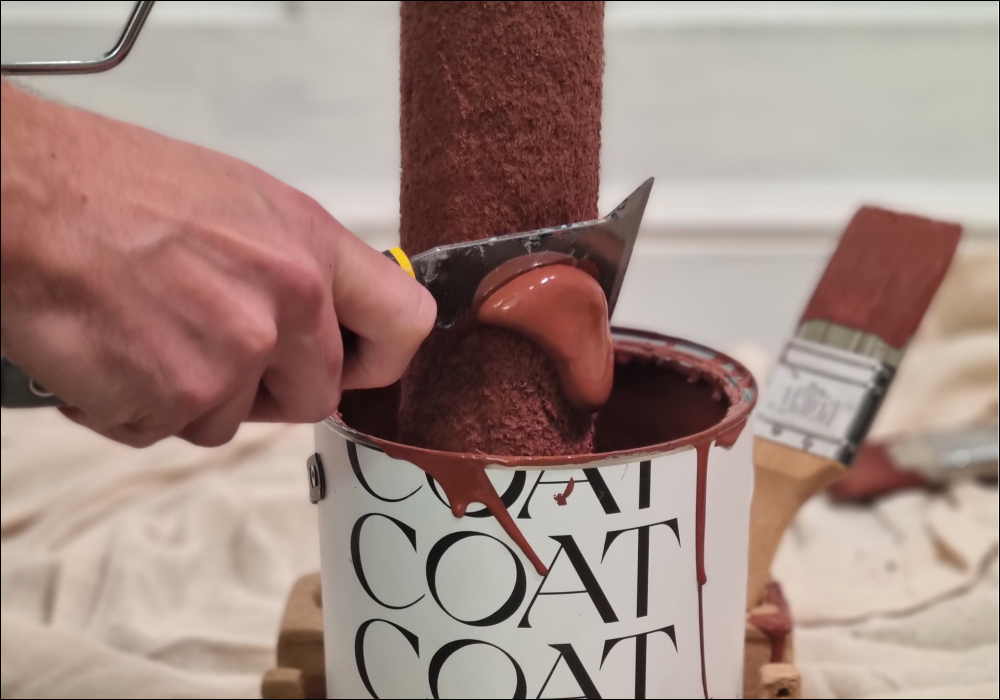
Subtotal
Shipping Options available at checkout Free Express Delivery

BASKET (0)

How To Paint Fireplace Surrounds

Whether it’s purely decorative or actually keeps you warm during the cold winters, a fireplace can definitely be the focal point of your room. It’s a statement period feature, providing insight into your home’s history, and inspiring intrigue. It could even be the very reason you wanted to buy your house in the first place. 

With all that considered, you wouldn’t want such a commanding feature to look tired and neglected – this could really let down the overall look and feel of your room. Perhaps you’ve thought about giving it a fresh lick of paint, but you feel nervous to start. In that case, the motivation is there, you just need to get equipped with some of our simple painting techniques, which will make the task a lot less daunting. 

@lovinglinden used Sunday Soul on her walls, paired with David Rose surrounding, the perfect monochrome duo.

Here, we’ll be focusing specifically on wooden fireplace surrounds, as this material responds best to our paints (and paint in general). If your fireplace surround is made of stone, there’s a chance that it’s an uber-historical feature, and painting this kind of material is never a good idea. Stone can absorb paint, which interferes with the finish, and the chemicals involved may ruin the stone. Cast-iron fireplace surrounds can be painted, but ideally not in the way we’re about to explain - it’s best to take specialist advice on that one. So, we’ll be focusing specifically on wooden fireplace surrounds, as this material responds best to our paints (and paint in general).

Read on and find out how to paint your wooden fireplace surrounds in style. 

Do you have an antique fireplace or a reproduction?

Wooden fireplace surrounds have been used in British homes throughout history, but the originals in our homes today are mostly from the Victorian and Edwardian periods, or the 1930s. Earlier fireplaces may have carved or intricate features, and later ones, from the Edwardian period, have art deco features. Fireplace surrounds from the 30s were typically simpler and carving free, but they were still very beautiful.

As years pass, and fashions change, so do fireplace surrounds. Yours may have been varnished, stained or painted, often with gloss paint. The main problem with this is that varnish can flake and peel over time, and gloss is typically an oil based paint which changes colour over time. A once bright, brilliant white can become yellowed and discoloured.

All of this can be rectified with a little time and effort – and some quality wood paint

Why not let the original features speak for themselves and paint around existing brickwork? Take inspiration from @victoriancheshireterrace. 

If your home is newer, then your fireplace surround might be a reproduction, meaning it was built recently but in the style of an older fireplace surround. You can treat this the same way as an antique one, but just be sure that the surround is made of wood or, at least, Medium Density Fibreboard (MDF). This will work with wood paints, and you’ll still get a good finish. 

Before you begin painting your fireplace surround, you need to make sure everything is safe. If your fireplace surround frames a real, open fire, it’s totally safe to paint it. Though the wooden surround can get warm when the fire is lit, it’s far enough away from the heat source to cause any trouble. And dried paint isn’t flammable, anyway, so you’re good to go. 

Take inspo from @littlevillagehouse and try going neutral with your woodwork and walls. 

On the other hand, if your fireplace surround frames a gas fire, you need to be really careful around the gas pipe inlet, so you don’t knock it or dislodge it. Keep it in mind as you’re renovating your fireplace surround. If you’re in any doubt, consult with a Gas Safe Registered engineer.

If your fireplace is ornamental, there is no limit to the choices you have. Just make sure you use paint that’s perfect for wood, like COAT’s Eggshell.

You can easily complete this paint job in a day, so it’s a great weekend project. In just nine steps you’ll have a statement fireplace surround you’re dying to show off.

Step 1: Choose your paint colours 

The best fireplace paint is suitable for wood, has a classy soft-sheen finish and gives you some choice in colour. COAT Eggshell paint ticks all of these boxes, and allows you to let your personality shine. It’s your home and it’s your fireplace surround, so you have a right to choose your favourite colour. 

@the18thhomeonthestreet used Safe Play around the fireplace and the leafy wallpaper really makes it pop. 

Making a statement with your fireplace surround is easy. There are so many fireplace paint colours which will work. Simply giving your fireplace surround a fresh coat of pure white Eggshell paint, like Screenshot, will be enough to make it bright, clean and flawless. You could even paint the other wooden features in the room – the skirting boards, the architrave, the windowsill, and the doors – the same colour, for a cohesive, harmonious feel. If you don’t want pure brilliant white, but you want a pale shade, go for a zen off-white like Mindful, a pale stone such as Rathbone Place, or a tonal neutral like Ambrose.

Why not paint the surround the same colour as the chimney breast? The surround and the wall behind it will become uniform, and you’ll have a seamless, chic vibe. The texture of the fireplace surround will be the highlighted, rather than the colour.

Take inspiration from @indigo_casa and paint your whole fireplace in one colour if you no longer use it, this created a cocooning feel. 

You could choose a dark, atmospheric colour which touches upon the history and the heritage of your home.  Rich reds like The Old Corset Factory, the deep green of Ditch the Tie, and moody blues like Adulting are popular period colours, harking back to the luxury and opulence of the Victorian and Edwardian periods, and giving a touch of class to your space.

@making_walford_magical using Brewer on the walls and wood surround to really enhance the traditional features of their home. 

If, on the other hand, your style is colourful and vibrant then you should embrace it. The clash of a traditional fireplace surround painted a bright colour is an exciting, eye-catching statement. Non- traditional fireplace colours include the cool mid-blue of Below Deck, an earthy orange such as Baked or a  rich, grubby yellow like House Points. Be brave. If you change your mind, you can repaint it, there’s no harm done.

Why not try using different tones of the same colour? @swoonworthy blog has just that, using Persipan and Percy in her living room. 

Another design choice which works really well is painting a heavy, solid wooden fireplace surround a pale, pastel colour. It softens the angular, statement fireplace with brilliant juxtaposition. It’s a way of adding colour and personality, but in a more restrained, mature way. Think of soft pink like Granny Chic, or a gentle sage green like Detox.

Step 2: Gather your tools

  • Two mini rollers, one for the primer, and one for your paint
  • Two roller trays, one for the primer and one for the paint
  • Primer, suitable for wood
  • Paint, wood paint, ideally with a classy Eggshell finish, in your favourite colour
  • Paint brushes
  • Something to stir your paint and primer with, like an old spatula (COAT stir sticks FTW if you’re using our paint)
  • A screwdriver, to remove the fireplace surround, if possible
  • A spirit level, to ensure the fireplace is put back on straight
  • Wood filler if there are any gaps or chips in the fireplace surround
  • Cleaning materials; degreaser, bleach and cloths
  • Decorators tape, to protect your wall, hearth and floor
  • Dust sheets, to protect your furniture and floors
  • Sandpaper, two grades, around an 80 grit and a 200 grit.
  • Two sanding blocks, one large and one small
  • Vacuum cleaner
  • Mask and goggles for sanding
  • Overalls or clothes you can move easily in, and you don’t mind getting paint on

Step 3: Prepare 

The first question is, can you remove your fireplace surround? If it’s a reproduction fireplace you almost certainly will be able to. Look to the sides of the fireplace for little metal fastenings, screwed into the wall. There should be at least four, a pair on either side. With a friend to help, unscrew it from the wall, and lie it flat on a dust sheet. Working on your fireplace while it’s flat is much, much easier.

If your fireplace surround is antique, and has been on that wall for a hundred years or more, then you’re unlikely to be able to get it off without damage, so definitely leave it where it is! It’s not a problem, you can still update your fireplace surround without much trouble, you’ll just have to mask up your walls.  

Step 4: Clean and sand

Dust and stray hairs ruin the final finish of your paint, so give everything a good clean before you begin to paint. Wipe over your fireplace surround with a soft cloth and a degreasing spray. Use a vacuum or a soft brush to get into any intricate carving or crevices.

It might sound strange to clean before sanding, but it’s an important step. If you start sanding straight away, you’re going to push any dirt or dust which has built up over the years into the wood, or you could spread the dust and dirt around. Cleaning your fireplace surround first means every step that comes next is easier.

Closely examine the fire surround to see if there are any gaps or chips in the wood and, if there are, fill them with wood filler. It’ll need to dry for a couple of hours before you can sand it smooth and paint.

Once you’re ready, put on the mask and goggles. It’s time to begin sanding. Using your roughest grade sandpaper and the sanding block, tackle the flat areas, like the pillars and the mantlepiece first. You’re not trying to get back to the natural wood. After all, you’re going to be painting it anyway. As you sand, use your fingertips to feel for any imperfections that might not be visible, and be methodical.

Next, repeat the whole process with the finer sandpaper. This gives the surface of your fireplace surround a “key”, meaning you’re covering it with thousands of tiny little scratches. You will barely be able to see or feel these scratches, but they’ll help the primer or new coat of paint to stick to the surface.

Wipe away all of the sanding dust and vacuum your space. You’re good to move on to step 5.

Step 5: It’s prime time

If you can’t remove the fireplace from the wall, then you need to mask up. Tear off strips of decorators tape of around 10cm/4 inches and stick them to the wall around your fire surround. Get as close to the fireplace surround as possible.

Open your primer, if you need to use it, and give it a good stir. Pour a little into a roller tray and, using a small paint brush, coat a very thin layer of primer into all the intricate or carved areas of your fireplace surround. Once these areas are done, use a foam roller to evenly cover the flat areas with primer. Let your primer dry for a few hours. You’ll need to check the guidance on the primer tin, as some brands vary.

Step 6: Apply your first coat

Now is when you see your vision come to life, and your fireplace is going to be transformed.

Open your tin of Eggshell wood paint and make sure you stir it really well. Decant some paint into a roller tray and use a small paint brush to get into all the corners, carvings and details of the fireplace surround. You’ll be putting at least two layers of paint onto the fireplace surround so aim for thin, even coats.

Using a foam roller will mean you won’t get paintbrush strokes in the finish of your fireplace surround, but you could use a paintbrush if you preferred. Be methodical as you paint, don’t jump from one part of the fireplace surround to another. Take it slowly and keep it consistent.

Step 7: Apply your second coat

Once you’ve finished painting your first coat, put your feet up and have a cuppa while it dries. After 2-3 hours, once the first coat is completely dry, you can apply the second coat of your colour following the same process as before.

Quick tip: put your roller tray, paintbrush and foam roller in a plastic bag while your first coat on the fireplace surround is drying. The plastic will stop everything from drying out, and then you can quickly reuse it for coat number two.

Step 8: Tidy up

Wrap up your dust sheets, remove the decorators tape from the walls and tidy away your tools and painting equipment. If you removed your fireplace surround from the wall, you can fix it back on once the second coat is dry. Get someone to help you with that part, and use a spirit level to ensure it’s perfectly straight.

Step 9: Style it your way

It’s time to fill your space with all your favourite things and show off your style.

@loveallthingsquirky opts for calming neutrals to create a relaxing and cosy space. 

If you’ve gone down the traditional route, why not lay a fire, with wood and kindling in the grate. Put antique candlesticks with tall white candles on the mantlepiece, add a mirror with a gold frame on the chimney breast, and a stack of antique books next to the hearth. Perhaps add a fireplace companion for a truly traditional vibe.

Keeping it neutral? Place your pot plants in the fireplace grate or add a tall vase with pampas grass in front of the pillars of the surround. Lean black and white framed photos along the mantlepiece, stacking the smaller photos in front of the larger photos for a classy vibe.

Whatever your style, your stunning new fireplace surround is now the perfect focal point of your room.

Feeling ready to start your fireplace makeover? Order some samples to test them out in your room ✌️


READY TO GET YOUR COAT?

LET'S GET YOUR COAT...

Net Orders Checkout

Item Price Qty Total
Subtotal £0.00
Shipping
Total

Shipping Address

Shipping Methods