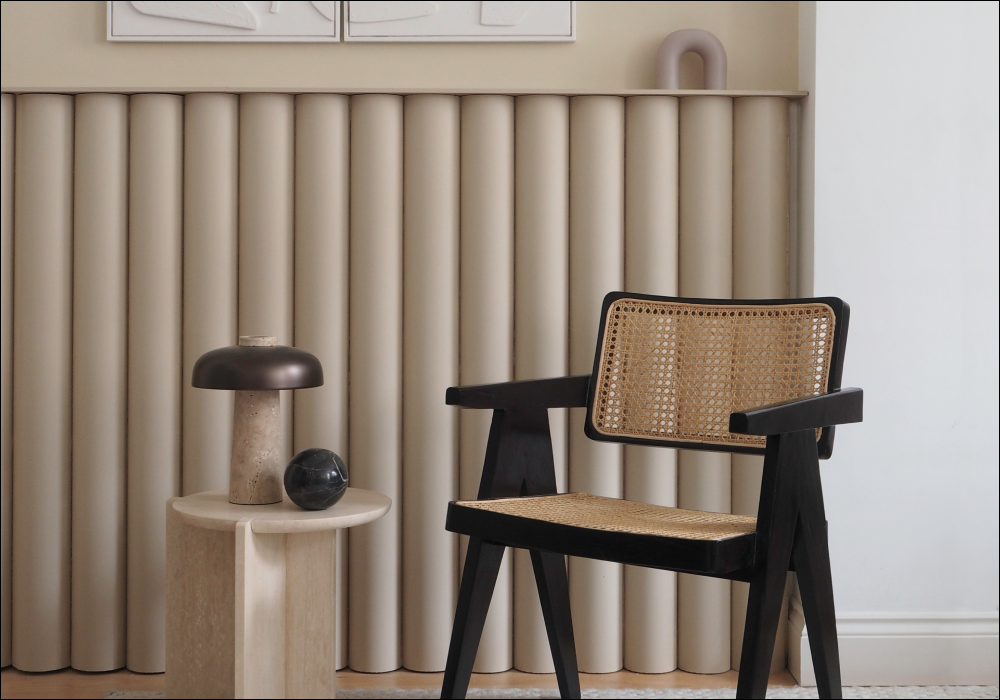
Wood panelling is popular, sure. But how about some next-level vintage glam with this heavy-texture panelling by interiors guru Luke Arthur Wells? We'll walk you through step-by-step how Luke did it, to help you get the look at home. It's surprisingly easy (but nobody will know it..!).

You'll need a few bits...
- MDF boards (or other board for backing)
- Wood battens
- PVC gutter pipe (Luke used 122mm wide)
- Circular or mitre saw
- PVC instant-grab adhesive
- 180 grit sandpaper
- Wall fixing/mount
- The COAT Eggshell colour of your choice!

Standard 2x2 or 2x4 wood battens nailed together create the frame
1. Start by constructing your backboard frame to the size you require. Luke made a simple frame using wood battens to the height of the MDF boards so that they didn’t require cutting.

MDF boards can be nailed to the wooden frame
2. Use a hammer and nails or nail gun to fix the MDF boards onto the front of the frame. Luke used a thin 3mm MDF board, so he added some extra supports on the back to strengthen it, but a thicker MDF may work without these additional struts. Leave you completely board flat for now, to make it easier to attach the pipes.

Cut your gutter pipes to length, and have some 180 grit sandpaper ready
3. Cut your gutter pipes to the size of your board using the circular saw, taking caution when doing so. Make sure you purchase a length of pipe that minimises waste when cutting.

Lightly sand the pipes, to help the Eggshell paint stick properly
4. Once you’ve cut all the pieces you need, rough-up the outside of the pipes with 180 grit sandpaper to ensure the paint will grip to it better later on.


Apply a few lines of instant-grab adhesive to the backboard
5. Using an applicator, apply the PVC adhesive to the board and fix the cut pipes one by one. Apply pressure to ensure the pipes stick - use an instant grab adhesive but allow it to dry and cure before the next step.

Use a multi-purpose primer before painting to make life easier
6. The last step is to paint using Eggshell paint. The pipes will require 3 or 4 light coats for total coverage, but you can also prime them to reduce the number of subsequent coats required and help the Eggshell paint stick properly.
Luke used his bespoke creations Humble & Well Grounded here

Apply Eggshell in long smooth strokes for a flawless finish
7. Once covered and dry, fix to the wall using the method of your choice. If you have space on your board to drill, you can use rawl plugs and screws, but Luke used a flush mount plate fixing on the board and wall.
Told you it was easy. Now how about giving it a go for a statement wall behind the bed, or in the home office? Wherever you do it and whatever colour you choose, you'll be sure to make a statement.
Shop COAT Eggshell Paints here, and give it a go yourself
