Once a humble space to store tools, nowadays sheds can be literally anything you need. Whether a man cave, a she-shed or a tranquil place to hang out, a decent sized shed can even add value to your property too. It doesn’t take much, however, for a shed to look knackered. So would we if we were forced to sit in shit weather. If it’s high time your shed felt some love, how about a new COAT? It’ll make such a difference to your shed's exterior. Better yet, the new paint will protect it from weather, so it’ll stay looking spruced up. Follow this guide to get your shed ready for summer.
Choosing The Best Type Of Paint
So what type of paint will a garden shed need? Well, first, it should offer a smooth weatherproof finish. There’s no point going to all this effort if your paint’s gonna peel off. You want the woodwork to look fresh for years. The best shed paint will boast special moisture protection yet offer a shade rich enough to enhance the timber exterior. Our tough exterior eggshell will keep your shed looking gorgeous. It can even be used for pergolas and fences too.

Picking The Best Paint Colour
On the hunt for some creative ideas to spruce up your shed? In this section, we’re gonna talk paint COLOUR. The right one can make a shed pop, no matter its use. And turn a utilitarian eyesore into a thing of sass. Even if you don’t want your shed to stand out, that’s ok too. There’s no reason why paint can’t be sympathetic to your garden. With no right or wrong answer, it totally depends on your style. Here’s some of our favourites for you to copy below.
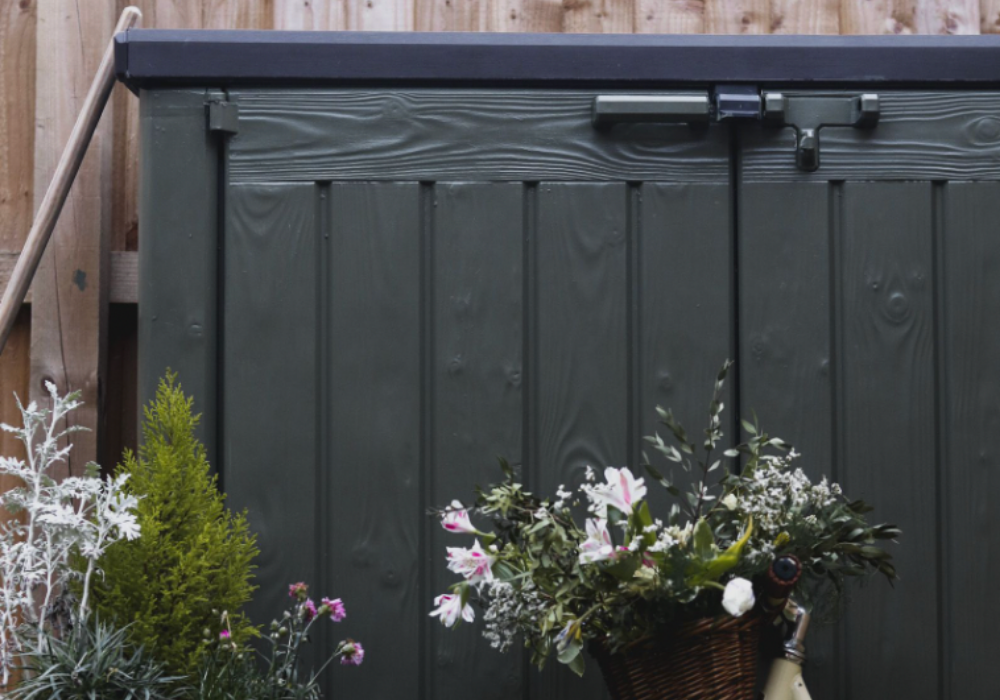
Green shed paint colours - Love the idea of a classic deep green? Ditch the Tie will allow your shed to blend in. Or perhaps you’d prefer a paler green shade? Then Yard Party will look insane on summer afternoons.
Bold garden shed paint colours - Can’t get enough of sunshine? Yellow is fun. And it’ll give a high contrast between shrubs and plants. House Points is a warm golden hue that’ll look fab on a shed. It’s playful, but it can be chic too.
Pure and breezy white - There’s nothing fresher than white. It looks so clean. And there’s a nice Scandi vibe to it too. If you like the idea of a pretty white shed, grab our White Swatch Pack. These shades are easy on the eye.

With COAT, there’s just no excuse to have a dingy old shed. Pick your fave shade, and then choose a warm day. You’ll also find more shed painting ideas at the end of this post. Don’t miss our modern colour schemes.
Timing It Right
As we’ve mentioned before, painting a shed needs a dry day and decent paint. Spring and summer are both great times of the year to crack the paint out. Just make sure there’s no rain forecasted for a good few days. The wood itself also needs to be completely dry before you can paint over the top. If damp, the paint will trap moisture and eventually rot. Likewise, you don’t want the weather too hot. This is also as bad, and it’ll cause the paint to dry far too fast.
The Tools You Need
- Protection for the grass and floor - old newspapers or a dust sheet will do
- Dust mask, gloves and goggles - painting is messy business
- A few cloths and warm soapy water - a garden shed will never clean itself
- Stiff hand brush - to scrub off any debris and mould
- A roll of decent masking tape - to avoid your windows getting covered in paint
- Large roller - for a flawless finish
- Small paintbrush - for those fiddly bits
- Multi-use primer - to prep like a boss
- COAT’s garden shed paint - in your favourite shade
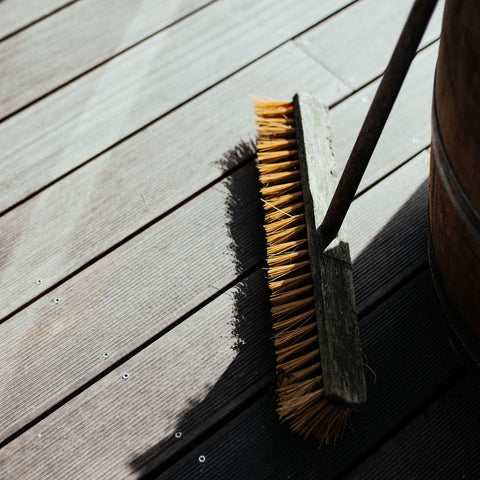
Step One: Clean Your Shed
Is your shed looking a little bedraggled? Is it full of algae? It’ll need a good clean before you can even think about paint. Grab a stiff-bristled brush and go over your shed. This should get rid of any debris such as cobwebs and mud. Next, you’ll want to use a bit of warm soapy water to give your shed a good wash. And make sure any cracks in the wood are cleaned thoroughly too. After rinsing it down, allow the surface to dry. Grab a snack whilst you wait.
Step Two: Sand Down Your Shed
New paint is always better applied to a smoother surface. It’ll last you many years without it peeling away. So, if your shed is ancient, you’ll want to give it a sand. Especially if it’s looking quite flaky from an older paint job. Begin using a 60-grit paper to remove any old paint, then switch to 120 to sand the surface down. Remember to always sand in the direction of the grain to get the best finish you can. Clean away any dust before moving on.
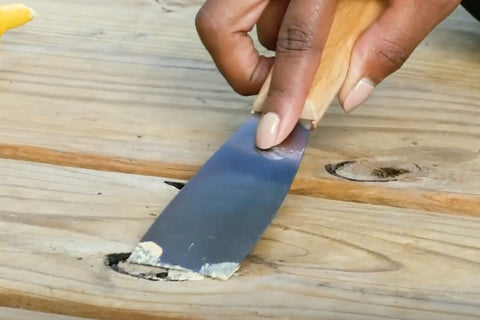
Step Three: Repair Any Damage
Now’s the time to replace any rotting sections of wood and check for old cracks. This type of thing should be rectified before applying the paint. If termites have taken over your shed, you’re gonna wanna know now. Often, it’s not super obvious until it’s too late. Whilst analysing your shed, with a fine-tooth comb, take the opportunity to fix cracks with wood filler and sand. If you think you have pests, contact a pro. AND DO NOT let the damaged wood anywhere near your house.
Protect Yourself And Your Surroundings
Once you know you’re bug-free, carry on with the prep. You’ll need to protect your surroundings before you can actually paint. Move any furniture off to one side and protect the floor with dust sheets. This is particularly important if your shed is on paving stones. If you have climbing plants, tie them back for more space. Newspaper will also make painting near windows a doddle. Then cover any metal fixings with tape like handles, hinges and locks. Pop on your goggles, and you’re ready to go.
Step Five: Prime The Shed’s Surfaces
Next, you’re going to apply a generous amount of primer to the whole thing. This will stop the paint from being absorbed by the wood. Two coats should be enough before leaving the primer to dry. It’ll also protect your shed from the elements and make the paint smoother.

Step Six: Get Painting
When your primer is dry, you’re ready to paint. Remove the lid and give it a good stir. Then starting from the top, get that paint on. Use a roller for larger areas and a brush for the smaller bits. Apply a thin, even coat along the grain of the timber. Try not to overload your brush or roller or let paint collect in the gaps. If you also spot any wet edges, brush them before they start dripping. Now you know how to paint a shed with a brush and roller. How long does it take to paint a shed? If you start early, it can be done in a day.
Shed Painting Ideas
On-trend colours
Looking for other shed paint ideas? OK, what about black? Or something uber cool like The Coal Drop? These shades are perfect for highlighting lush plants and other greenery too. Plus, they’ll make a new shed feel like it’s been there forever. If you’re loving this look, paint your fence in them too. Black and greys are hugely popular for a chic focal point. Need help creating balance and form? Grab our Monochrome Pack. These dramatic shades just might surprise you.
A Strong Colour Combination
Wanna try a blue shade but scared to commit? A soft neutral will help balance this out. We love the idea of a mid-blue with white for staycation-like vibes. Exterior Below Deck is the one for outdoors.

@sharnshouse opted for a bold and bright garden shed. We LOVE it.
An Interior Colour Pop
In love with two shades? Totally fine. Use one for the outside and one for in. If you work from your shed, you’ve got to love the colour, and if it means going bold, well, then that’s fair play. Plant Power will invigorate and inspire while you sit at your desk. There’s nothing like a pop of colour to get you motivated. But, once the shed door is closed, it’ll be your little secret. Especially if the exterior is painted a more understated shade like The Record Store.
Ombre
Feeling really daring? Try ombre. A gradient of colour can make a big impact. Simply choose a few similar colours to create a dreamy transition. Shed goals, anyone?

@bloomandfolk painted their garden storage using 'David Rose.'
Step Seven: Let The Paint Dry
Once that first coat is on, leave it to dry. In fact, it’s probably time to get yourself some lunch. Allow 2-3 hours and have a well-deserved rest before you come to do that next COAT.
Step Eight: Apply The Second Coat Of Paint
If your shed needs another coat, simply repeat step 6. Flick the kettle on and leave it to dry. When the paint has completely dried out, you can start to pack up. Remove any newspaper from windows and drop cloths from floors. Once dry, your shed should then be ready to rock. How amazing are you? Your neighbours are gonna be well jel. After all that hard work, you deserve a cold drink. Enjoyed in the shadow of your awesome new shed. Cheers.
Looking for that dreamy shed shade? Shop the COAT range. You’ll never paint the same again.
