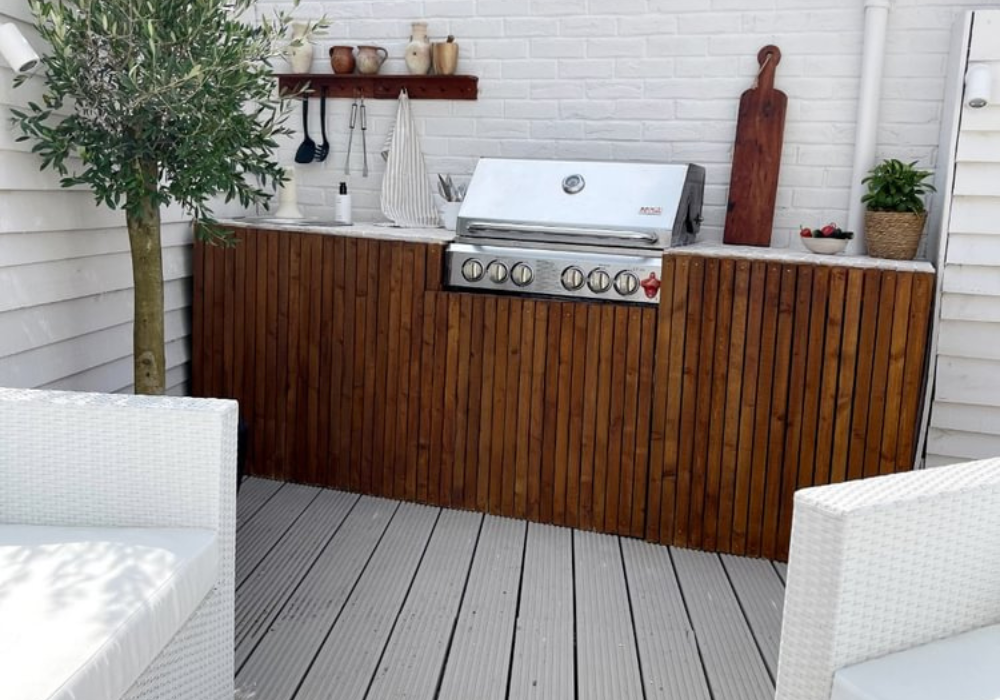
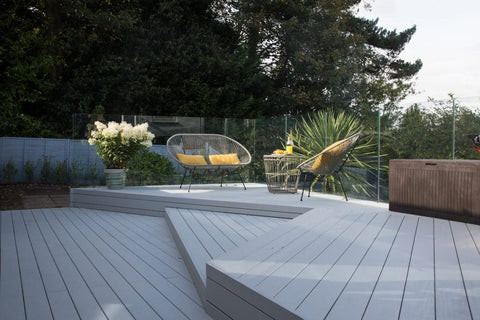
Nothing revives old wooden decking like a fresh COAT of paint, and it can bring a hot new look to your garden. Whether you’re after a greige or blue-grey, the results will look fab. Look up decking paint ideas, and you’ll see. But knowing how to do it correctly is super crucial. Your decking puts up with a lot. Battered with seasonal showers, sun, mould and much more, decking can succumb to damage if left untreated.
So, do you really wanna blow your annual bonus on a garden reno? Should you paint your decking instead? All it takes is a few simple steps to get your deck looking lit. We’re gonna show you how to do it right there. We’ve also thrown in some garden decking ideas using our on-point COAT shades. The best paint for decking is definitely the exterior kind. This will keep your decking structurally sound so you can enjoy it for longer. Paint is also typically more rot resistant and does a better job of preventing mould and sun damage. Likewise, paint wins again when it comes to cleaning. It can actually be quite hard to clean dirt off rough stained wood. Ready to start? Follow this guide for everything you need to get the job done right.
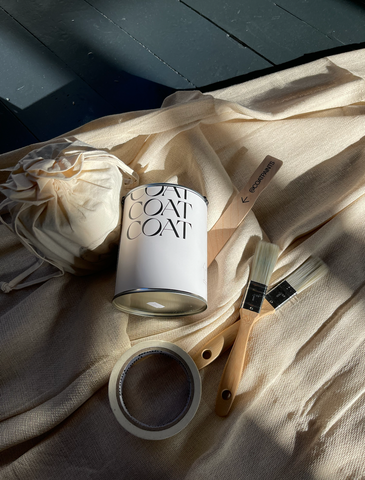
Gather Your Tools
When it comes to decking paint colours, you can’t go wrong with our flawless high-grade shades. A quick way to elevate your space, a paint job won’t break the bank. Plus, the right kind can act as a barrier against the elements too. Before you get going, you’ll need the right kit. Painting’s a doddle when you’re fully prepared. Also, make sure to check the weather forecast before you begin. You’ll discover why if it rains…
You’ll need to grab:
- Plastic sheeting - for protecting brickwork and doors
- Painters tape - for sticking them down properly
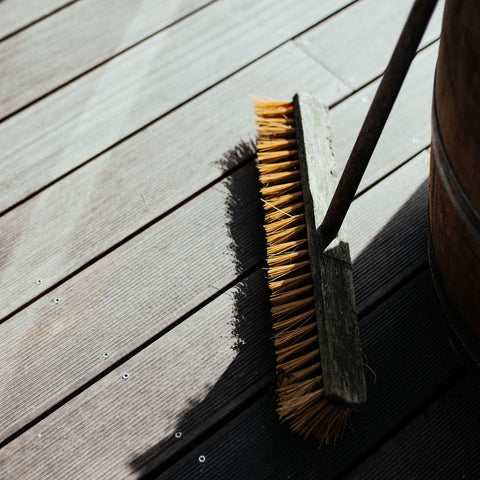
- Broom or sweeping brush - to clear and sweep the deck
- Garden hose or jet wash - the latter can be hired or borrowed from dad
- Ear defenders - pressure washing is pretty noisy
- Safety goggles - in case any debris flicks up during jet washing
- Pressure washer attachments for cleaning decks
- Scrubbing brush - to sweep away excess water
- Paint scraper - if your decking is full of old peeling paint
- Electric sander - also available to hire from dad’s garage
- Screwdriver - if necessary
- Tin of multi-surface primer - to prep your deck like a boss
- Large rollers - this will speed up for the process and get a uniform COAT
- Paintbrushes - these are handy to have for painting restricted spots
- COAT’s Exterior Paint - in a modern colour you’ll love for years
Prepare Your Decking For Painting
Been searching for ways to paint garden decking? This step-by-step guide can help you make sense of it all. In fact, the simplest stage is actually painting the deck. The other bits, well, they can be tricky. Your best bet is to take it one step at a time and in your stride. We’ve got you; it’s totally doable. Start by clearing away any chairs, tables and plants so your deck is empty. Stick them in a shed or a garage for now. This way, you’ll be able to start with a blank canvas and a clearer vision. Here’s how to prep correctly to get the results you want:
Clean The Surface
Begin by grabbing your brush and having a sweep to get rid of any debris and leaves. Congrats if you’ve managed to get hold of a jet wash, it’ll make things easy. Otherwise, a garden hose can be used instead. With a pressure washer, you won’t have to spend hours scrubbing your deck. The pressure will blast away grime. Including the algae and moss that forever plague outdoor woodwork. A word of warning, however, use a jet wash with caution. Wood can expand and contract when saturated with water.
Pop on your wellies and do a test wash. This will help you adjust the settings for optimal cleaning. Then when you’re happy, continue with a steady, smooth speed along the grain of your decking. This will create a nice even wash. Try not to pause in one place as this can damage the wood. Also, aim to keep the nozzle about 6 inches away from the floor. After completely spraying the whole deck, finish with a soft rinse. This will help to wash away any loose debris and detergent left over. Once your decking is clean, have a sweep of the water and leave to dry for around 24 hours. Don’t be tempted to paint over damp wood, as this can trap moisture and lead to rot and algae growth.
Sand Down Your Boards
After scraping away layers of old paint, start with a good sand. Scraping alone rarely gets rid of it anyhow. In fact, sanding is an essential step in the preparation process. This is because power washing can cause wood fibres to swell and lift as they expand. For this reason, sanding is key to getting the refinishing just right. You don’t want cracks and splinters to ruin that new COAT. An electric sander will also speed up the job. But remember, only ever sand in the direction of the grain. Wood can get damaged if you sand against it.
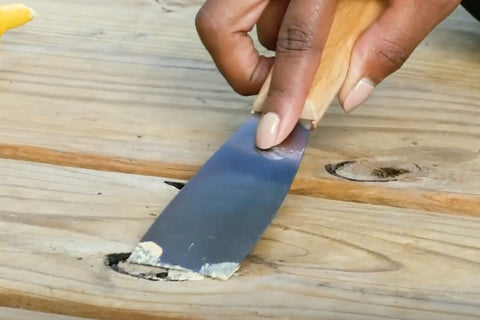
If your decking is older, you’ll need to do a few other steps. Painting over imperfections won’t get you far. So use a wood filler to tackle any large splits, chips or dents. Wait for it to dry before sanding again. Ideally, you want to get the surface perfectly smooth so that the paint can adhere. Old nails should also be removed or knocked in, so they sit flush with the wood. Spotted any loose boards? Now is the time to fix them. The outer edges of the decking should be sanded too. You can always skip the wood filler if you don't mind a dishevelled effect. But you still need to sand, particularly if you're dealing with an older deck. Make sure that the surface decking is smooth by using a medium-pressure. Check for evenness as you go.
Clean Your Boards
As soon as you've sanded your deck, clean it again. You don’t want debris, dust, and wood shavings showing in your paint. Sweep with a soft-bristle broom before rinsing with water. After 24 hours, your decking will be ready to prime.
Prime Your Decking
Now that you’ve sanded and cleaned, it’s time for that primer. It doesn’t matter whether your decking is old or new. Since all decking’s outside, this step is crucial. Exposure to moisture and various temperatures can cause paint to peel. As wood is also notoriously porous, a primer will stop the decking from unevenly absorbing the paint. Simply grab a large roller, and give it two coats. Thinner is better than gloopy, we promise.
With this in mind, which one should you use? There are so many different brands of primer. We might be biased, but ours is fab. This multi-use primer dries quickly and helps your topcoat to stick. Although COAT paints are generally self-priming, an undercoat will ensure your chosen shade doesn’t bubble or peel. As a result, it’ll make your efforts last longer and look much better. Time spent on the prep is definitely time well spent. If you are changing your decking from a dark colour to light, our primer will hide the old shade with no bleed through at all. Whilst it dries, pop the kettle on and let’s look at some shades. Garden decking paint designs are worth thinking about.
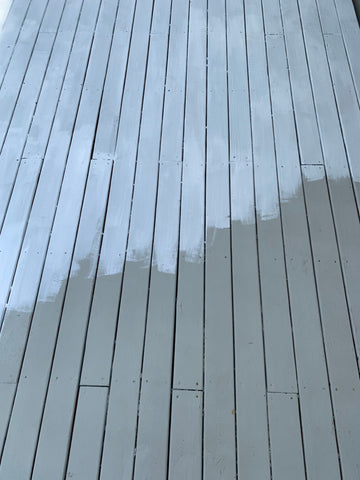
Paint Your Decking
Once your decking is dry, it's time for the fun. Picking the shades for your look. Whether you want to keep it subtle or create a dark, moody backdrop, at COAT, our paints will very easily transform your backyard. For instance, if you’re looking for a secret escape, The Record Store will allow plant life to pop and create a Bali-esque vibe. Green is also a lovely tone for outdoors, and it works with most homes. Try Park Life. It’s dreamy AF.
Once you’ve selected your shade, give it a stir. Then, with a roller, paint from the corner of your decking and work backwards towards an exit (this is so you don't accidentally paint yourself in). Paintbrushes are also useful for those trickier places, but for the most part, a roller will get it done much quicker. Go three to four boards at a time, top to bottom. Two coats should be enough. After a couple of hours, your decking should be dry to the touch, but it’ll need around six before you can walk on it.
To keep your deck in good nick, sweep it often. It’ll also need a good clean once a year with a low-pressure flow. New decking should also be left for six months before it’s painted. Any existing treatment will have eroded by then, allowing the new paint or stain to properly adhere and sink in.
Looking for a super smooth decking paint that will last you for years? Grab your fave shade in our Exterior Eggshell finish.
