Nothing rejuvenates a piece of dull wooden furniture, scuffed skirting boards or fixtures or even an old wooden toy like a fresh coat of paint. However, simply slapping a new coat on top of the old isn’t a long-term solution. Sooner or later, you’ll discover that you need to learn the best way to get paint off wood so you can repaint properly.
Luckily, paint removal from wood surfaces isn’t generally difficult. If you approach it properly – with the right tools and steps– it won’t be much of a chore. Here, we’ll look at the best ways to get paint off wood generally, as well as delving into the specific problems of removing particular kinds of paint. We’ll discuss the tools and paint removal products you should be using for the best results. We’ll even look at how you can tell when a wood surface is worth stripping and repainting, or when it is simply time to replace the piece entirely.
So, gather your cracked and blistered bannisters, your chipped and stained skirting boards and your finger-printed doors*, and we’ll show you how to get the old paint off, exposing a clean and fresh wood surface for a new, exciting COAT of paint.
*We mean figuratively, of course. You should paint these things in place wherever possible.
What Is The Best Way To Remove Paint From Wood?
Paint removal from wood has probably been a problem since a year or two after someone first discovered how effective paint was in preserving wooden surfaces, thousands of years ago. Of course, paint technology has advanced quite a bit in recent times, as has paint removal technology. So, how is paint removed from wood today?
The three most popular options for paint removal from wood surfaces are probably sanding, chemical stripping and heating. Each has its strengths and weaknesses, and each works better with particular kinds of paint and particular shapes of wood.
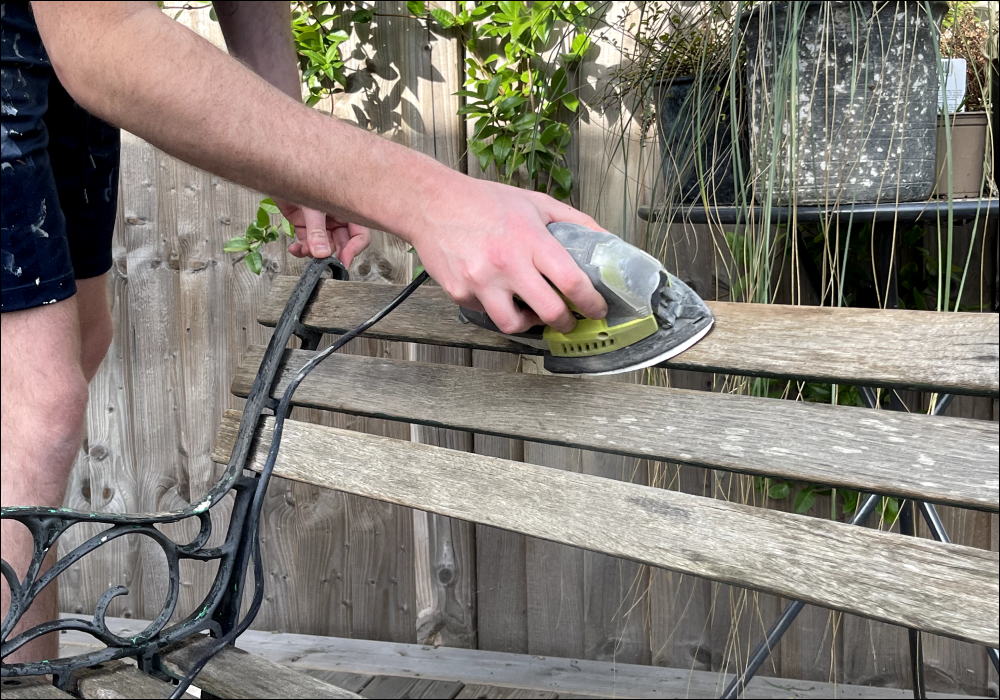
- Sanding, of course, is removing paint by abrasion via grit glued to a paper backing. This can be done by hand or via power tools. The advantage of sanding is that it works on almost every kind of paint, and can be used on awkward or curved shapes easily. The disadvantages are that over-sanding can easily wear away the wood itself, and that sanding can be a lot of work. If you want to work those muscles, this is for you.
- Chemical stripping means applying a chemical which softens, loosens and/or dissolves the paint. It is a good method for delicate wood that can’t be sanded, or complex shapes that don’t allow either sanding or heating. However, it can be very messy and smelly.
- Heating is simply applying intense heat to the paint to cause it to peel off the wood. This is usually done with a specialised paint removing tool. This tends to be a fast and low-labour method compared to sanding or chemical stripping, but it can be dangerous. You could easily burn your fingers or char the wood. Actually starting a fire is not unheard-of either.
Paint Removal From Wood, a Step-By-Step Guide
COAT’s guidance on paint removal from wood includes an initial assessment of the wood itself, choosing the right tools and techniques, and of course the nitty-gritty of actually getting the paint off the wood. Just follow these 9 steps, and you should see excellent results!
Step 1: Find Out If The Wood Is Worth Exposing
While paint removal from wood surfaces isn’t particularly challenging, it isn’t without effort or expense either. You should assess whether the wood is really worth repainting or refinishing before you go to the trouble of stripping or sanding it.
This is especially important if you do not plan on repainting the wood, but rather plan to varnish it or refinish it in a way which features the grain of the wood surface. Some wood simply isn’t suited to a clear coat finish.
To figure this out, find a relatively inconspicuous spot on the wood – if it is a piece of furniture, for example, look for an inside edge. Next, use a scraper, hobby knife or a similar tool to remove a small section of paint. This rarely needs to be more than a few centimetres, and often less.
Examine the exposed wood surface. Does it show damage from woodworm or rot? If so, it is probably not worth removing the paint. You should consider starting fresh with a replacement piece.
Step 2: Select The Right Tools For The Project

Sanding
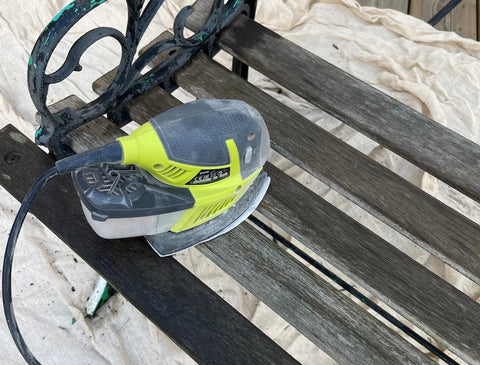
Sanding paint off wood by hand is a very old process. Like a shark, it hasn’t changed in a very long time because the old way still works. That said, it becomes tedious and time-consuming when used on large surfaces. That is when you should consider a power sanding disk attachment for a drill or angle grinder, or a clapboard sander.
Chemical Stripping
Using a paintstripper for wood resurfacing has many advantages. It does not produce dust, it preserves fine details in the wood, and works well with awkward shapes. If you Googled ‘how to remove paint from wood without sanding’, you’d hear about chemical stripping straight away. Just make sure you wear protective gloves, and work in a well-ventilated area.
Heat-Based Paint Removal
Paint heaters use electricity or combustible fuel to soften thick layers of paint, and can often remove several layers at once. The softened paint can then simply be scraped off. If you need to learn how to remove paint from wood without chemicals and skipped right over sanding as the labour intensive option, heating is the method of choice. Just be careful not to burn anything.
Step 3: Decide How You’re Going To Strip The Paint
Once you know what basic ‘paint removal from wood’ technology you’ll be using, you need to think about specifics.
Sanding
Use a belt sander if you have a large amount of material to strip off quickly, or to prepare the surface for finer sanding work with a different tool later. Make sure that you always sand with the grain when using a belt sander.
Use a disc sander, clapboard sander or random orbital sander when you do not want to leave scratch marks, and which can be easily accessed by a circular sanding head. This can be a challenge for some home improvement applications.
Use a finishing sander for detail work. These are perfect for small or delicate jobs, but if you try to use them for a big job, it could take all day. Even then, though, it is faster than using sand paper and elbow grease.
Heating
Heat guns look like overpowered hair dryers, because that is basically what they are. They used forced convection to blow air past an electrically heated coil in order to conduct that heat into the paint. Most have variable heat settings, and you can modify the rate of heating more delicately by changing the distance from the nozzle to the paint. The most important thing is probably to keep the gun moving over the paint surface, but read the safety instructions that come with a heat gun carefully before using it.
Infrared heaters are a quieter option. They heat the paint by ‘heat rays’ rather than hot air. They work quickly, and most importantly have safety cut-offs that won’t typically allow the paint to become too hot. However, they can be bulky and difficult to use in small spaces. They are not the least expensive tool for paint removal from wood, either. Not by a long shot.
Steam Strippers get the heat to the paint using water vapour; sothey cannot normally raise the temperature of the paint above 100OC. This is great for fire safety. However, this might not be hot enough to remove paint from wood at all, and when it does work it can leave the wood a bit soggy. You’ll have to let it dry before repainting or refinishing.
Chemical Stripping
Smartstrip is a paint stripping paste based in benzyl alcohol chemistry. It can be applied with a brush, a roller or a sprayer. It requires between 3 and 24 hours to loosen most kinds of paint.
Peel Away is designed for masonry paint and lead-based paints. Once applied, you should cover it in paper to prevent the chemicals evaporating too quickly. The active ingredient in Peel Away is lye. It is not well-suited to use on furniture, and terrible things can happen if you get it in your skin or inhale the vapours.
Citristrip is a paint stripping gel which is designed for use on furniture or for woodwork with fine details. It is based on NMP, or N-Methyl-2-pyrrolidone. Once you’ve scraped off the paint, use mineral spirits to remove any residue from the wood.
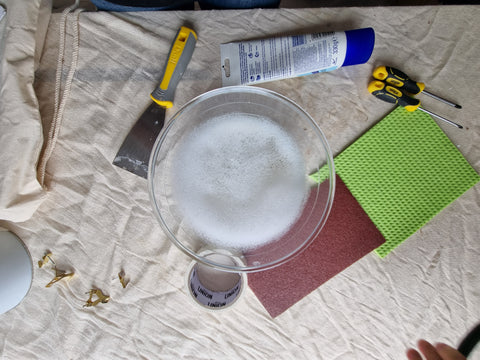
Step 4: Choose Your Paint Scrapers

If you’ve chosen a chemical or heat-based paint removal process, you’ll also be doing a lot of one thing: scraping paint from wood. Both methods make this a great deal easier than it may sound, though. There are several types of paint scrapers available.
A basic single-edge paint scraper is just a flat metal surface with a handle. Again, it’s like a shark. It still works, so why ‘fix’ it?
A flooring scraper has a broad scraping edge and a long handle. They are useful for lots of surfaces bedsides floors.
A hook scraper has a curved, hook-like projection which can help you get into awkward nooks and crannies.
A multitool scraper or ‘painter’s tool’ is a paint scraper with extra attachments – often a paint roller cleaner, a paint tin opener, a spackle angle and more.
A putty knife is often pressed into service as a paint scraper. They are sometimes useful because they are very flexible compared to most paint scrapers.
Step 5: Prepare The Area Before You Begin Stripping Paint

Begin by removing everything even vaguely portable from the area. It is tempting to ‘just throw a cloth over it’, but if you get paint splatter on that big expensive telly, you’ll wish you had made the effort.
The canvas drop-cloth is the traditional way to protect carpets, floors and immovable furniture from the dangers of painting and paint removal. Many still use them because they are carbon-friendly, reusable and effective. Others prefer plastic sheeting, as this catches even fine grit, and won’t let paint or chemicals seep through – unless the delicate film tears. Some go even further, and cover the first layer in old newspapers.
Whatever you use to cover your surfaces, make sure it extends 1.5 to 2 metres past where you’ll be working. If you need more than one sheet/cloth, overlap the edges and tape the sheets together.
If you are using a chemical paint stripper for wood surfaces with hardware or other attachments, make sure you ‘mask’ that hardware with a painter’s tape that is resistant to solvents.
Step 6: Dress Correctly When Stripping Paint

In the same way you don’t want paint or weird chemicals on your chairs or television, you don’t want them on your skin, in your hair or in your eyes! You probably don’t want them on your most expensive clothing, either.
If you are sanding or just scraping the paint off without the aid of chemicals or heat, make sure you wear a respirator with a particulate filtration rating of P100. If you are using a chemical paint stripper, use a respirator with a chemical cartridge appropriate to the stripper (see manufacturer’s safety information).
Use wrap-around safety glasses or goggles to protect your eyes from splashes, fumes and paint chips.
Wear either a painter’s coverall, a disposable coverall or your most sacrifice-able long sleeve shirt and trousers.
For scraping or heat-stripping, wear stout construction gloves. For chemical stripping, use either butyl or nitrile ‘rubber’ gloves. Again, see the manufacturer’s safety information.
Finally, wear disposable booties even though they look silly. Remember to take them off when leaving the work area, as well.
Step 7: Actually Begin Stripping Paint
I know, right? 6 steps of preparation. But you made it. Get your gear, and use it safely and appropriately. We’ll just nip off for a cuppa while you do the grunt work.
Step 8: Detail The Stripping Work
Ahh. The hard part is done. You’ll need us to supervise again.
The detail work won’t generally be back-breaking, but it will make or break the entire paint removal process. If you don’t pay proper attention to the nooks and crannies, and get all the paint out of the detail-work, the next coat will just make the piece look lumpy and poorly defined.
As always, the right tools can make the job easier. The good news is that you’ll already have most of these around the house.
Dental picks or cocktail sticks can help you clear debris and the last remnants of paint or paint-stripper from cracks and tight spaces.
Sanding cords aren’t a common household tool, but they are great at penetrating crevices. Think of them as dental floss for decorative columns.
An old credit card or ID can make a fine custom scraper – just cut them to match the surface you’re scraping.
Spoons – as in silverware – are great at scraping both convex and concave surfaces.
Step 9: Clean Up Your Paint Stripping Job

Now for clean-up. Unless you’ve used chemical stripping exclusively, there will be dust and paint chips all over your drop cloths. Use a spray bottle to mist water over the surface – only enough to make it very slightly damp.
Then fold up the cloth, newspaper, plastic sheeting or other coverings (dirty side in), and put them in a bin liner. If the drop cloths are re-usable, you can shake them out outside. If not, straight to the bin they go.
Use a vacuum cleaner equipped with a HEPA filter to get the last specs of dust and paint. This is particularly important if you suspect the paint might have contained lead.
Wipe all surfaces down with a damp cloth and a little washing up liquid. Don’t rinse the cloth down the drain, as that waste water might be toxic. Check with your local council for disposal.
Give everything a final once-over with a damp cloth.
Aaaaaand we’re done. You’re ready to refinish your surface, or to repaint it with any fine COAT product.
For interior woodwork that’s freshly stripped, you should start with a primer. Our uniquely formed water-based Primer smooths, fills and bonds uneven surfaces, giving deliciously smooth primed walls, prepped and ready for painting.
Grab your colour in our Eggshell finish. It’s smooth, and super durable, needing fewer COATs than most and is made with high quality ingredients to combat knocks, scuffs and scrapes for years to come.
Top tip, apply with a foam roller not a brush, for a smooth and even finish (yep, we sell those too. Shameless plug. But the tip is still true!)
